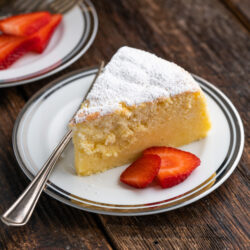
This Japanese Cheesecake recipe is different from your typical cheesecake but it so light and fluffy that it truly melts in your mouth!
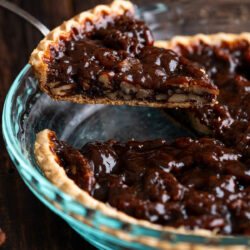
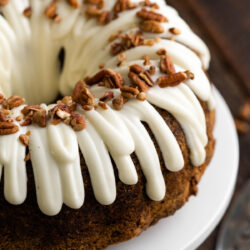
I love a fluffy international cake because you simply cannot find them in the grocery store like you can every other cake. If you are wanting other recipes like this then you have to check out my French Apple Cake, Mayan Chocolate Glazed Bundt Cake or Apricot Coffee Cake!

You guys, this cake almost defeated me. Honestly, I wasn’t sure if I was even going to make this post because it doesn’t look perfect. But isn’t that a part of life? Even when something isn’t perfect, you can still find joy in it! And this is exactly what I did with this Japanese Cheesecake.
I made this cake so many times and had so many fails. I under cooked it, I burned it, I had too much batter in one version. So, while this might not have been the easiest recipe to develop, don’t let that keep you away from making this because: THIS CAKE TASTES AMAZING!
Not your Typical Cheesecake
Now, when you first see this recipe you might be thinking, this is not what I think of when I think of a cheesecake. You are absolutely correct. This cake reminds me more of an angel food cake from the texture and how light and fluffy it is. However, when it comes to baking it, it has more of the process and ingredients of a cheesecake.
How to Make Japanese Cheesecake
Assemble your ingredients. For exact amounts see the recipe card below.

Preheat your oven to 350 degrees Fahrenheit.
Grease a 9 inch cake pan and line the bottom with parchment paper.
In a pot on the stove, melt the cream cheese, butter, and milk and whisk together until smooth, then remove from the heat and set aside.

Separate the egg yolks and egg whites into two large bowls. Once the cream cheese mixture has cooled to room temperature whisk it into the bowl with the egg yolks.

Next, add in the lemon juice, vanilla, and half of the sugar into the mix.

Then, add in the flour, cornstarch, and salt into the mix and whisk together until there are no more lumps.

Next, in the bowl of egg whites, use a hand mixer and whip the egg whites. Once you’ve reached soft peaks, add in the sugar and cream of tartar and continue mixing until firm peaks.

Then, and this is the most important step, using a metal spoon gently fold in ⅓ of the egg whites into the mixture and then fold in the remainder of the egg whites ever so lightly into the mix.
Note: The batter should look almost marbled, do not fully incorporate them together or it won’t come out correctly and you will lose the bubbles and air in the batter.

Pour the batter into the cake pan and place the cake pan on a baking sheet with sides and add in a very thin water bath using hot water (if it’s easier to add the water when it’s already in the oven that works too and keeps water off your floors).
Bake at 350 degrees Fahrenheit for 30 minutes then lower the temperature to 300 degrees Fahrenheit and bake for 12 minutes. After this, turn the oven off and open the oven door slightly for 30 minutes then remove from the oven and the water bath and allow the cake to cool to room temperature.

Finally, top with a generous dusting of powdered sugar and enjoy!

Important Notes for this Japanese Cheesecake:
When combining the egg whites into the batter mixture be sure to use a metal spoon. This minimizes the amount of air bubbles that are lost. With this being a fluffy, airy cake you want as many of those air bubbles to hold.
As you are folding into the batter you do not want to incorporate completely. You want your batter mixture to look marbled after a few simple folds into the batter
While this cake is in the oven it will stretch and hold this perfect shape. However, because of its spongey consistency, once it has cooled it will shrink down. This is completely normal and will not change the overall flavor of the dish.

Storage Information
You can store this dish in an airtight container on your countertop for 2-3 days. You can also store this cake in your fridge in an airtight container for 3-5 days. If you are wanting to freeze this cake you can do so for 2 weeks in your freezer in an airtight container, but note that you will lose some of the fluffy consistency by doing this. I would not recommend freezing this dish.
Other delicious dessert recipes:
- Banoffee Pie
- Alfajores
- Homemade Waffle Ice Cream Sandwiches
- Peanut Butter Balls
- Hello Dolly Bars (Magic Cookie Bars)
- Rosemary and Olive Oil Ice Cream
Japanese Cheesecake Recipe
RECOMMENDED PRODUCTS
Ingredients
- 8 oz cream cheese
- 4 Tbsp butter
- 7 Tbsp whole milk
- 6 eggs - seperated
- 1 1/2 Tbsp lemon juice
- 2 tsp vanilla extract
- 3/4 cup sugar - divided
- 3/4 cup all purpose flour
- 2 1/2 Tbsp corn starch
- 1/4 tsp salt
- 1/4 tsp cream of tartar
Instructions
- Preheat your oven to 350 degrees Fahrenheit.
- Grease a 9 inch cake pan and line the bottom with parchment paper.
- In a pot on the stove, melt the cream cheese, butter, and milk and whisk together until smooth, then remove from the heat and set aside.
- Separate the egg yolks and egg whites into two large bowls. Once the cream cheese mixture has cooled to room temperature whisk it into the bowl with the egg yolks.
- Next, add in the lemon juice, vanilla, and half of the sugar into the mix.
- Then, add in the flour, cornstarch, and salt into the mix and whisk together until there are no more lumps.
- Next, in the bowl of egg whites, use a hand mixer and whip the egg whites. Once reached soft peaks, add in the sugar and cream of tartar and continue mixing until firm peaks.
- Then, and this is the most important step, using a metal spoon gently fold in ⅓ of the egg whites into the mixture and then fold in the remainder of the egg whites ever so lightly into the mix. Note: The batter should look almost marbled, do not fully incorporate them together or it won't come out correctly and you will lose the bubbles and air in the batter.
- Pour the batter into the cake pan and place the cake pan on a baking sheet with sides and add in a very thin water bath using hot water (if it’s easier to add the water when it’s already in the oven that works too and keeps water off your floors).
- Bake at 350 degrees Fahrenheit for 30 minutes then lower the temperature to 300 degrees Fahrenheit and bake for 12 minutes. After this, turn the oven off and open the oven door slightly for 30 minutes then remove from the oven and the water bath and allow the cake to cool to room temperature.
- Finally, top with a generous dusting of powdered sugar and enjoy!